
Whiteworms
Whiteworms, Enchytraeus albidus (Henle, 1837) are probably one of the most popular forms of live food cultured by aquarists. They are an excellent, easily produced form of live food that is highly nutritious and especially valuable for conditioning rainbowfishes before spawning, or for young fast growing fish. Fed two or three times a week; they will give your fish a nutritional boost. The actions of your fish will change dramatically when they see the movement of live struggling worms in the aquarium.
Some aquarists feel that fish fed exclusively on whiteworms become obese due to the fat content of the worms. However, the problem may lie more with overfeeding with the worms, rather that the fat content of the worms.
The secret for successfully raising whiteworms is to understand their particular needs and supply them. Their successful cultivation is largely dependent upon constant care and attention to small details in the condition of the culture. The principal things to be considered are the medium; moisture, and food. Whiteworms required soils containing relatively high organic matter content and a soil pH of about 6.8 to 7.2 for optimal conditions. Whiteworms will usually not survive in acid soils (i.e. < pH 5).
Experience has shown that shallow wooden boxes work best. Typical worm boxes are 15 to 60 cm long, 15 to 30 cm wide and no more than 10 to 15 cm deep. In any case the use of several small cultures rather than a large one is advisable. Plastic containers with drainage holes punched in the bottom have been used with success.
However, simple boxes made of pine and plywood is generally preferable to plastic, Styrofoam, or other materials because the joints allow better drainage and aeration of the soil.
The culture must be covered to block out light and keep out predators. Ants, beetles, and other creepy crawlies will feed either on the worms or the food. A secure lid and careful placement of the culture box will prevent such pests. An inner soil cover is recommended to keep the soil surface from drying out. Any flat material that can be pressed lightly onto the surface of the soil will serve as a cover.
I use a thin piece of scrap glass cut smaller than the surface area of the soil. Leave a border of about 15-mm of soil exposed to the air. The collection of moisture at the cover attracts the worms, making it an ideal place to feed them. By feeding and attracting the worms to the surface, it will be easier to collect them to feed to your fishes.
Whiteworms will grow in any kind of light loam soil of such a character that it does not easily harden when dry, while on the other hand it should not be sandy. Potting mix obtainable from most garden supply stores should be adequate. Choose a good quality mix as I have found some potting soils contain a lot of coarse material in them. Leaf mould and humus are excellent additives that will improve the soil significantly. Some of the best mixes are those that have been designed for growing seedlings. These are generally very fine and hold moisture well, but remain loose.
Whichever soil you choose, ensure that it doesn’t contain any chemical fertilisers, sterilisers, fungicides, pesticides and other man made chemicals or contaminants, as these additives will kill the worms.
Fill the box about two-third full with your chosen soil mix. The surface of the soil should be level and pressed down, not too firmly, to leave no lumps above to dry or mould. Wet the soil until it’s reasonably damp, allowing any excess water to drain. There should be sufficient moisture to allow free movement of the worms but not enough to bring them to the surface except as they may congregate on the under side of the piece of glass resting on the surface of the soil. The next step is to get your starter culture. These are often available from aquarium stores, live foods suppliers or from a fellow hobbyist.
Once you have your starter culture, empty the contents on top of the media. Sprinkle a small amount of food over the surface of the soil and spray with water. Place the soil cover on the surface, put the lid on and move the box to an area that will stay between 15–21°C. For best results, keep the culture in a cool dark area. Allow the culture to stand undisturbed for several days to allow your whiteworms to propagate.
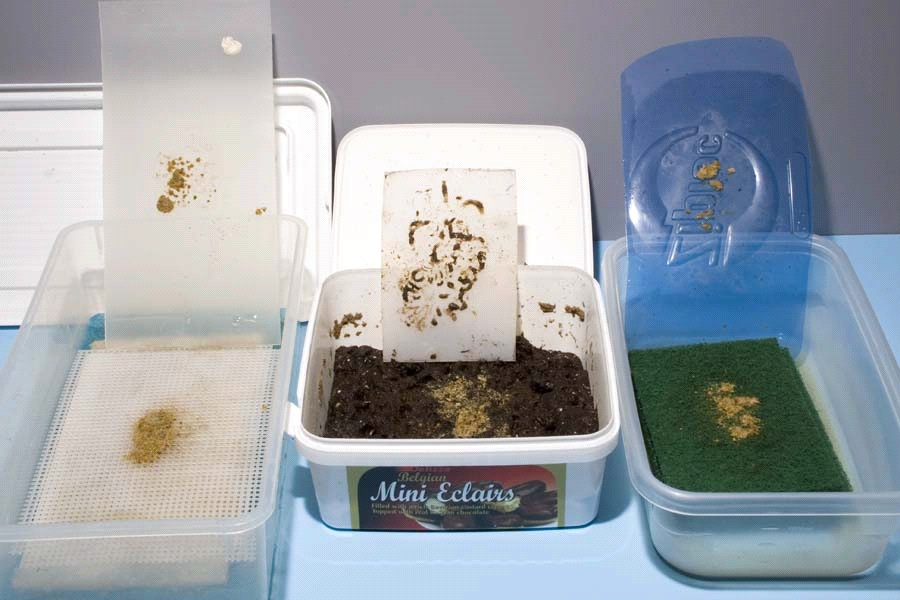
The current trend for culturing whiteworms is to use small individual flat plastic food containers stored in an electronic wine cooler, which can be maintained at the desired temperature. This not only provides the ideal temperature, but also keeps unwanted pests out of the culture.
Whiteworms reproduce normally at and above 8–10°C, with optimum growth and reproduction occurring between 15– 21°C. As the temperature begins to rise or fall below this range; their production rate will decline. Growth has been reported to occur more rapidly at the higher end of the range with maturity in about 28 days at 20°C, the clitellum (The clitellum is responsible for producing the cocoon in which the eggs are deposited) forming when the worms were about 13–14 mm. The maturation period at 8°C was at least twice that at 20°C. Experience has shown that at temperatures above 30°C or below 0°C, whiteworms will die.
Whiteworms will eat just about anything organic. Aquarists feed their worms vegetable based foods such as plant material, oatmeal, bread soaked in milk, wheat flour, cereal, mashed potato and dozens of other similar foods. They will even eat flake and pelleted fish foods, dry dog and cat food, if they are pre-soaked beforehand. One feeding trial reported that the best single food for whiteworms was breadcrumbs. In another study (Memi et al., 2004), whiteworms were fed five different diets, and after 90 days the numerical increase in their population was calculated. Four of the five diets were composed of carbohydrates, vegetables, fruits, and commercial trout feed pellets, and the fifth was composed of a combination of all four of these. At the end of the study, the greatest numerical increase and best reproduction was found to have occurred with the commercial trout feed pellets, which contained 45–47% protein and 12% fat. The least increase in number of individuals was observed in the vegetable-based group. In yet another study with whiteworms that were fed vegetable-based and cereal powder-based diets containing casein attained higher levels of weight and reproductively than those that were fed vegetable and cereal powder-based diets not containing casein.
A more recent study reported that the best results in whiteworm production were obtained by implementing different diets in alternation. However, we are what we eat, so the nutritionists tell us. Well, worms are no different and I found that Heinz® high protein baby cereal (blended with water), provides excellent results. The cereal also provides higher protein levels than many of the other foods. This higher protein increases the nutritional value of the whiteworms, which is then passed on to your fishes. Similar procedures are used in commercial fisheries with brine shrimp. Young brine shrimp are fed an enhanced diet, which is passed on to the fish when they eat the shrimp.
Whiteworms should not be fed too heavily at first because surplus food tends to attract mites, fungal growth, and bacterial contamination. You will have to regulate the amount of food offered during the first month until the culture stabilises. Replenish the food supply, as needed (ideally every three to four days). If the food supply is not entirely consumed between feedings, you are adding too much food for the worm population.
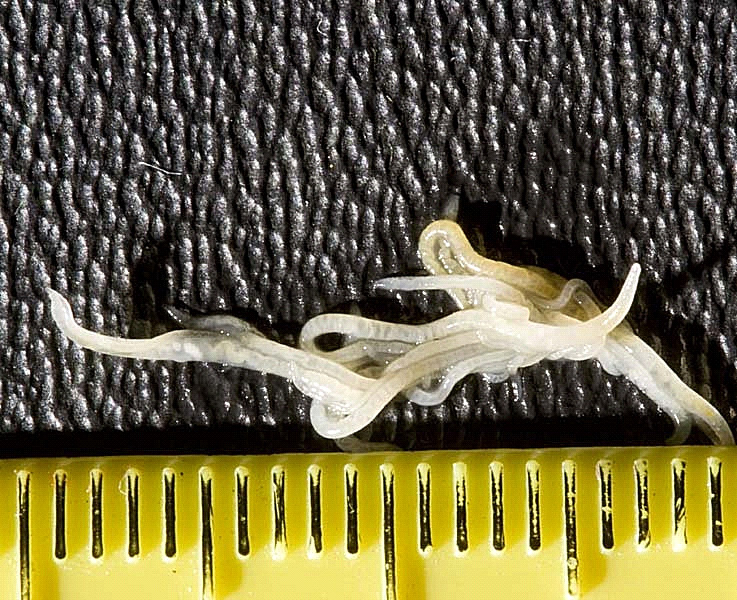
Whiteworms are one of the largest species of the genus Enchytraeus (adults reach 15–40 mm in length and from 0.5 to 1.0 mm in diameter). They are hermaphroditic, with each individual having both male and female reproductive organs. One worm mates with another individual and each fertilise the other. The worms exchange sperm cells during copulation and eggs are laid in transparent cocoons. Each cocoon produced by young adults contains 9–10 eggs; cocoons from mature adults produce 20–25 eggs. As the culture density increases, the reproductive rate levels off and old worms will only produce around 2–3 eggs per cocoon. The highest egg production reported was in the vicinity of 35 eggs per cocoon. Average per total population in culture is 10 eggs per cocoon. The eggs hatch in 12 days, and worms begin reproducing in 20–28 days depending on temperature. Each individual can produce as many as 1000 eggs over its life span.
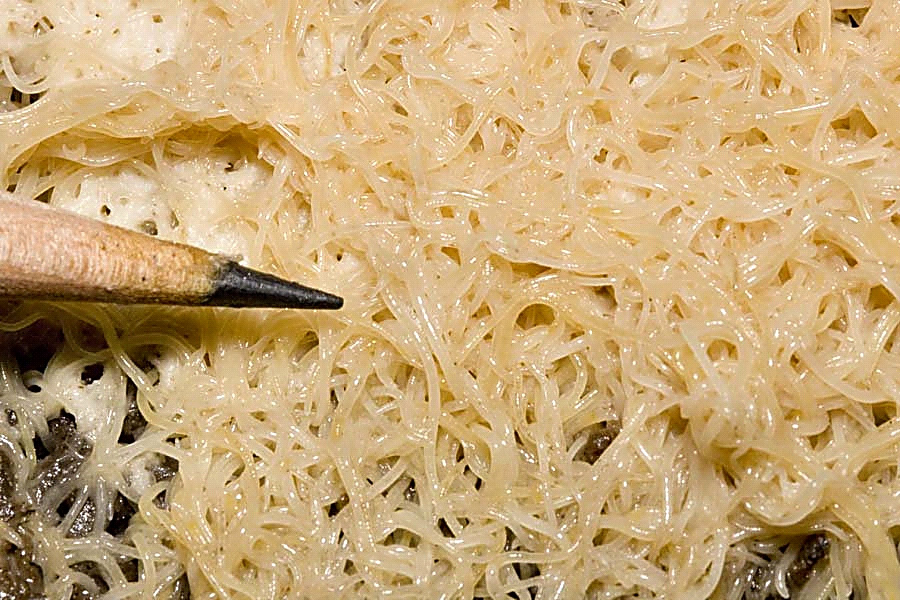
If the culture is maintained properly, the worms will gather in mass on the surface of the soil. The worms will often congregate on the glass cover where they can be scraped off and fed to your fish. Do not harvest worms before the first month of growth. Let the culture grow and you will be able to make new cultures and collect all the worms you need. You will need to inspect the culture for food and moisture levels two or three times a week. If the food is gone, then increase the amount of food given. If food remains, then remove the excess and reduce the amount provided.
You may find that the moisture level of the culture will drop and that the surface of the soil will begin to dry out. If this condition is allowed to continue the worms will start to go deeper in the soil seeking moisture. When they do this, they are also moving away from the food you place on the surface of the soil. Spray with water to maintain a damp, but not soggy, look and feel. A plant sprayer or mister can be used for this purpose. The regulation of moisture may be aided by removing the cover for a time as necessary. In laboratory testing, reproduction and body length was reduced with soil humidity (moisture) content of 15% and lower. On the other hand, higher soil humidity did not necessarily coincide with higher densities. During the test, it was found that low soil humidity inhibited not only reproduction, but had also a negative effect on the growth of the parent generation. Soil humidity is best maintained at around 22–26%.
Mould may often be present but does not seem to interfere with worm production if the food masses are not large. Removal of surface growth and taking the cover off to allow short drying periods will help keep it in check. However a souring culture is to be strictly avoided. Whiteworm cultures are often infested with mites. These small spiders like creatures are harmless and will not do any damage other than eating the whiteworms’ food. If you keep your culture in a refrigerator, then mites will not be a problem. After a period of six to nine months, the soil texture will begin to break down due to the activity of the worms, and the soil will become very acidic. This inhibits the production of worms, leaving you with only adult worms. To maintain your culture, the old soil should be removed and fresh soil placed in the box. The culture can be divided into several boxes at this time, as it is a good idea to have more than one culture in operation. You can transfer most of the worms by collecting from the old box and placing them in the new box. Another simple method to replace an old culture is to scoop away the top 2–3 cm of soil with most of the worms and gently mix it into fresh, moist soil in a new box.